
Remember the first time you bit into a warm thumbprint cookie with that perfect pool of sweet jam in the center? There’s something almost magical about that simple combination – buttery cookie, fruity jam, and childhood memories all wrapped into one bite.
I’m about to share my grandma’s jam-filled thumbprint cookies recipe that consistently disappears within hours at every family gathering. These little gems strike the perfect balance between easy-to-make and impossible-to-resist.
The best part? You probably have everything you need in your pantry right now. No fancy ingredients or complicated techniques – just delicious, homemade thumbprint cookies that look like they came from a bakery.
But before I reveal the secret to getting that perfect jam-to-cookie ratio, let me tell you what makes this version different from all the others you’ve tried…
Why Thumbprint Cookies Are a Crowd Favorite

The Perfect Balance of Texture and Flavor
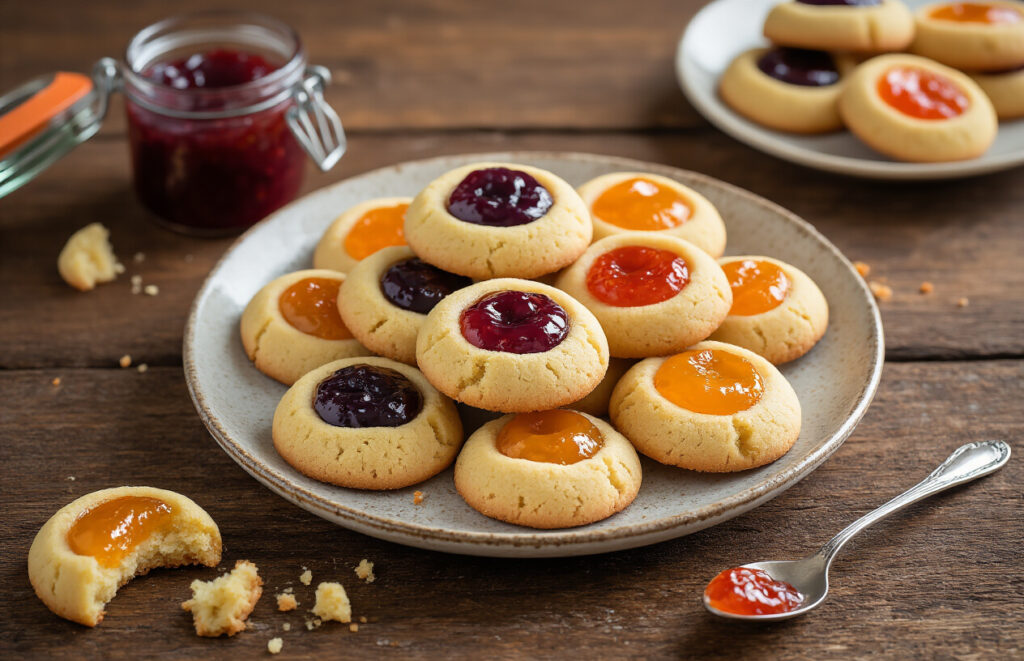
Ever bitten into a thumbprint cookie and experienced that moment of pure bliss? That’s what makes these treats so irresistible. The outer cookie provides that satisfying crunch that gives way to a tender, buttery middle. Then comes the sweet, tangy jam center that just melts in your mouth.
It’s this play of textures that makes thumbprint cookies stand out in a sea of desserts. They’re not too soft, not too crunchy – just perfectly balanced, like the cookie equivalent of hitting the sweet spot.
And let’s talk about that flavor combo! The rich, buttery cookie base paired with bright fruit jam creates a taste experience that’s greater than the sum of its parts. One minute you’re enjoying that vanilla-scented dough, the next you’re hit with a burst of raspberry, strawberry, or apricot goodness.
Nostalgic Appeal for All Ages
These little gems have been gracing cookie platters for generations, and for good reason. They remind us of grandma’s kitchen, holiday cookie exchanges, and childhood afternoons watching cookies being made.
Kids love the colorful jam centers that look like little jewels. Adults appreciate the not-too-sweet sophistication and the memories these cookies bring back. I’ve seen 80-year-olds light up at the sight of these cookies just as much as 8-year-olds.
That’s the magic of thumbprint cookies – they’re timeless. No fancy ingredients or complicated techniques required, just simple goodness that transcends food trends and fads.
Versatility with Different Jam Flavors
One cookie, endless possibilities. That’s the beauty of thumbprint cookies.
Feeling traditional? Go with classic strawberry or raspberry jam. Want something tangy? Apricot or orange marmalade adds a zesty twist. Craving something unique? Try fig preserves or black currant jam for a sophisticated flavor profile.
You can match your jam flavors to the season too:
- Spring: Strawberry or rhubarb preserves
- Summer: Blueberry or peach jam
- Fall: Apple butter or grape jelly
- Winter: Cranberry or spiced plum preserves
The best part? You can make one batch of dough and create an assortment of flavors. Perfect for indecisive bakers or for pleasing a crowd with varied preferences.
Some folks even go beyond fruit, filling their thumbprints with chocolate ganache, caramel, or lemon curd. The cookie canvas stays the same, but the masterpiece changes with each filling.
Essential Ingredients for Perfect Thumbprint Cookies

A. High-Quality Butter Makes a Difference
The secret to incredible thumbprint cookies isn’t complicated – it’s butter. Not just any butter though. Grab unsalted European-style butter with higher fat content. Trust me, this small upgrade transforms your cookies from “pretty good” to “where have these been all my life?”
Room temperature butter is non-negotiable. Cold butter won’t cream properly, and melted butter ruins the texture. The perfect butter should dent slightly when pressed with your finger.
Cheap butter often contains more water and less fat. More water means tougher cookies. More fat means tender, melt-in-your-mouth magic.
B. Best Flours for the Right Texture
All-purpose flour works fine, but pastry flour creates that delicate, crumbly texture that defines perfect thumbprints. If you can’t find pastry flour, mix 2 parts all-purpose with 1 part cake flour.
For gluten-free versions, almond flour or a quality 1:1 baking blend keeps things tender. Just watch your baking time – these flours brown faster.
C. Selecting the Perfect Jam Varieties
The jam hollow isn’t just decoration – it’s the star! Seedless varieties work best since they won’t disrupt that smooth bite. Traditional favorites include raspberry, strawberry, and apricot, but blackberry and fig jam offer sophisticated alternatives.
Homemade jam beats store-bought every time. Making a small batch just for these cookies? Totally worth it.
Thick jam is crucial. Runny jam escapes the thumbprint during baking. If yours is thin, simmer it for 5 minutes to reduce and concentrate those flavors.
D. Optional Flavor Enhancers
Take your thumbprints from classic to unforgettable with these additions:
- Vanilla bean paste instead of extract
- Almond extract (just ¼ teaspoon!)
- Orange or lemon zest in the dough
- Cardamom or cinnamon for warmth
- A splash of bourbon in darker jams
Roll the edges in chopped nuts, coconut, or sparkling sugar for texture contrast. Or drizzle finished cookies with white chocolate for pure decadence.
Step-by-Step Cookie Making Process

A. Preparing the Perfect Dough
There’s a secret to thumbprint cookie dough that most recipes don’t tell you – temperature matters! Start with butter that’s cool but pliable, not straight from the fridge and not melty. Cream it with sugar until just combined – overbeating adds too much air and makes cookies that spread.
Mix in your egg yolks (save those whites for another project) and vanilla. Now here’s the trick: when adding flour, use a light touch. Stir until the dough just comes together. Overmix and you’ll end up with tough cookies nobody wants.
Want to know if your dough is ready? It should feel like soft playdough – not sticky, not crumbly. If it’s too sticky, pop it in the fridge for 15 minutes. Too dry? Add a teaspoon of milk.
B. Shaping Techniques for Uniform Cookies
Consistency is the name of the game here. I swear by using a small cookie scoop – it’s like having a secret weapon for perfect cookies every time.
Roll each portion between your palms until smooth. Any cracks? That means your dough needs to warm up a bit.
Pro tip: line them up on your baking sheet with at least 1.5 inches between each ball. These babies don’t spread much, but they need their personal space.
C. Creating the Perfect “Thumbprint” Indentation
Your actual thumb works great, but if you’re making a big batch, use the back of a measuring teaspoon to save your digit from soreness.
Press down gently, about halfway through the dough ball. Too shallow and your jam will overflow; too deep and you’ll crack the base.
Notice cracks forming around the edges? No problem! Gently pinch them closed with your fingers while the dough is still warm and pliable.
D. Jam Filling Tips for Neat Results
Not all jams are created equal for thumbprints. Seedless varieties work best – raspberry, apricot, and strawberry are my go-to options.
The game-changer? Warm your jam slightly before filling. Just 10-15 seconds in the microwave makes it easier to pour and helps prevent bubbling during baking.
Use a small spoon or piping bag to fill each indentation about 3/4 full. Don’t overfill! That jam will bubble and spill over during baking, creating a sticky mess.
E. Baking Time and Temperature Secrets
The sweet spot is 350°F (175°C) – hot enough to set the cookies without browning them too quickly.
Watch for subtle signs they’re done: just barely golden around the bottom edges with tops that still look pale. This takes about 12-14 minutes in most ovens.
The true test? The cookies should be set but still slightly soft when you remove them. They’ll firm up while cooling, giving you that perfect texture contrast between crisp exterior and tender center.
Troubleshooting Common Thumbprint Cookie Problems

A. Preventing Cookies from Spreading
Ever pulled out a tray of thumbprint cookies only to find flat, sad-looking discs instead of neat, plump cookies? Been there. The key to preventing spread is all about temperature.
Cold dough = less spread. Always chill your dough for at least 30 minutes before baking. If your kitchen is particularly warm, pop the shaped cookies back in the fridge for 10 minutes before baking.
Butter content matters too. If your cookies consistently spread, your recipe might have too much butter. Try reducing it by 1-2 tablespoons next time.
Another ninja trick? Add an extra tablespoon or two of flour to your dough. It works wonders without affecting the taste.
B. Fixing Crumbly Dough Issues
Crumbly dough is the nemesis of perfect thumbprints. When your dough resembles sand instead of a smooth ball, it needs more moisture.
Add liquid one teaspoon at a time. A bit of milk, an extra egg yolk, or even a splash of vanilla can bring your dough back from the brink.
Don’t overwork the dough trying to fix it. Too much handling activates the gluten and makes tough cookies. Instead, gather the crumbles, add your moisture, and gently press together.
Room temperature ingredients are non-negotiable. Cold butter can’t incorporate properly, creating that dreaded sandlike texture.
C. Solutions for Jam That Bubbles Over
Jam volcanoes might look dramatic but they make for sticky cookies. First rule: don’t overfill those thumbprints! A half teaspoon is plenty.
Create deeper, wider indentations. Use your thumb or the back of a measuring spoon to make a substantial well that can contain the jam as it heats.
The freezer is your friend. After filling with jam, freeze the cookies for 10-15 minutes before baking. This head start helps the cookie structure set before the jam gets hot enough to bubble.
Thicker jam works better. If yours is runny, simmer it for a few minutes to reduce and thicken before using.
Creative Variations to Try

Chocolate-Dipped Edges for Extra Decadence
Listen, thumbprint cookies are already pretty amazing, but dipping those edges in chocolate? Next-level goodness.
Just melt some semi-sweet or dark chocolate chips in the microwave (30-second bursts, stirring between), then dip half of each cooled cookie into the melted chocolate. Place them on parchment paper and let them set. The contrast between the buttery cookie, sweet jam, and rich chocolate creates this mind-blowing flavor combo that’ll have everyone grabbing seconds.
Nut-Coated Variations
Want to add some crunch? Roll your cookie dough balls in finely chopped nuts before making the thumbprint. Try:
- Almonds for a sophisticated twist
- Pecans for southern charm
- Walnuts for earthy richness
- Pistachios for a pop of color and unique flavor
The nuts toast slightly during baking, adding this amazing aroma and texture that plain thumbprints just don’t have.
Seasonal Flavor Combinations
Switch up your jam choices based on the season:
- Spring: Strawberry jam with lemon zest in the dough
- Summer: Blueberry jam with vanilla bean specks
- Fall: Apple butter with cinnamon-infused dough
- Winter: Cranberry jam with orange zest
You can even add matching spices to your dough—cardamom with apricot jam or ginger with peach preserves. Trust me, these little tweaks make all the difference.
Savory Thumbprint Options
Thumbprints aren’t just for sweet tooths! Try these savory versions for your next cocktail party:
- Parmesan dough filled with pesto
- Cheddar dough with pepper jelly
- Herb dough with cream cheese and olive tapenade
- Rosemary shortbread with caramelized onion jam
Sprinkle with fresh herbs before serving. These savory bites pair perfectly with wine and will totally impress your guests who are expecting the usual cheese and crackers.
Storing and Serving Your Cookies

A. Maintaining Freshness for Days
These cookies are at their absolute best when fresh, but with proper storage, they’ll stay delicious for days. The secret? An airtight container. No joke – it makes all the difference.
Layer your cookies between sheets of parchment paper to prevent them from sticking together (especially important with that gorgeous jammy center). Room temperature works perfectly for 3-4 days.
Want to keep them softer longer? Toss a slice of bread in the container. The cookies will absorb moisture from the bread instead of drying out. Pure magic.
And please – don’t refrigerate these babies. The fridge actually speeds up staleness in cookies. Crazy but true!
B. Freezing Options for Make-Ahead Baking
These thumbprints are freezer champions. You’ve got options:
Freeze the unbaked dough balls (with thumbprints already pressed) on a baking sheet until solid, then transfer to freezer bags. When ready to bake, add jam to the frozen dough and bake directly from frozen, just adding 2-3 extra minutes.
Or freeze the fully baked cookies! Cool completely, then freeze in layers separated by parchment. They’ll keep for up to 3 months. Thaw at room temperature for about an hour before serving.
C. Beautiful Presentation Ideas for Gifting
Nothing says “I care” like homemade cookies. For gifting:
- Stack cookies in clear cellophane bags tied with colorful ribbon
- Line vintage tins with parchment paper for an extra-special touch
- Create a cookie box with different flavors of jam centers (raspberry and apricot look stunning together)
- Add a handwritten tag with storage instructions
For parties, arrange on a tiered stand with sprigs of fresh mint for a pop of color that’ll have everyone reaching for seconds.
Conclusion

These jam-filled thumbprint cookies are truly a timeless treat that brings joy to any occasion. With just a handful of simple ingredients and our step-by-step guidance, you can create these buttery, jam-filled delights even if you’re new to baking. Whether you stick with the classic recipe or experiment with our suggested variations, these cookies are guaranteed to impress your friends and family.
Don’t forget to store your thumbprint cookies properly in an airtight container to maintain their freshness. And remember, baking is about enjoying the process as much as the result—so have fun with your creations! Why not bake a batch this weekend and discover why these charming cookies have remained a beloved favorite for generations?