
Ever pulled a tray of cheese twists from the oven and felt that rush of pride when they’re actually golden and crispy? Not the sad, soggy versions that flop in your hand. Yeah, that feeling is culinary victory.
I’m about to share my foolproof method for making crispy cheese twists with puff pastry that will make your friends think you’ve been secretly training at pastry school.
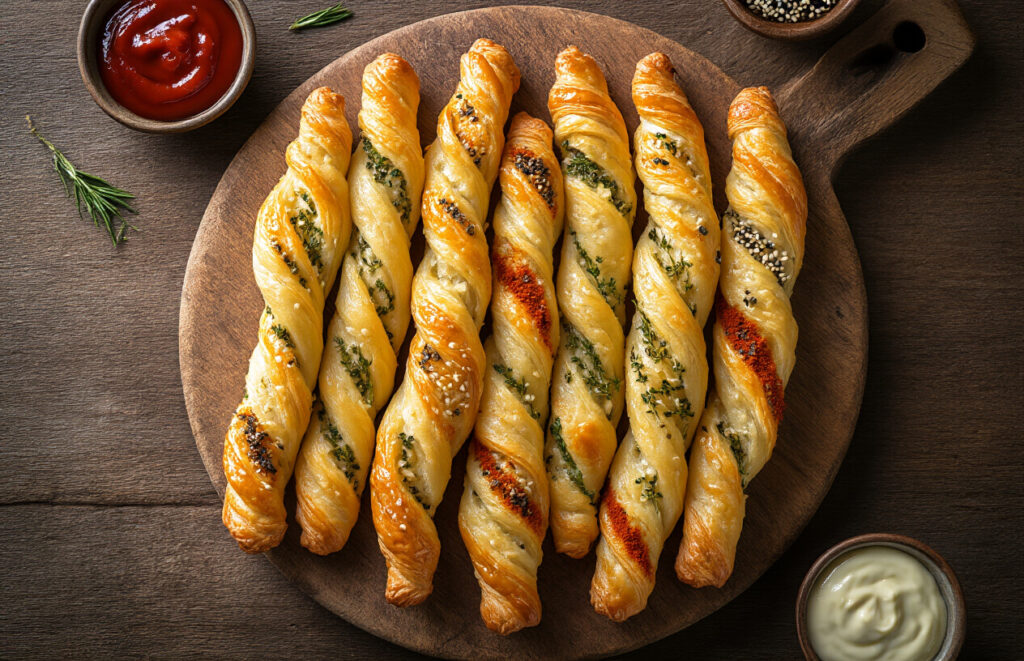
These aren’t just any appetizers. They’re the ones that disappear first at parties, that make people ask “Who made these?” while reaching for seconds. The ones that combine that satisfying crunch with melty cheese in perfect harmony.
But here’s the thing about achieving that perfect crisp – there’s one step most recipes completely miss, and it makes all the difference.
Ingredients You’ll Need for Perfect Cheese Twists

A. Selecting the Right Puff Pastry
Look, not all puff pastry is created equal. Trust me on this one.
For truly crispy cheese twists, you need all-butter puff pastry. That cheap stuff with vegetable oils? It’ll work, but your twists won’t have that melt-in-your-mouth richness.
Frozen puff pastry is totally fine – just thaw it properly in the fridge overnight. Rush this step and you’ll end up with a sticky mess that tears when you try to twist it.
The thickness matters too. If it’s too thin, your twists will burn before the cheese melts. Too thick and they’ll be doughy inside. Aim for about 1/4 inch thickness or just roll out the pre-packaged sheets once.
B. Best Cheeses for Crispy Twists
Cheese selection can make or break your twists. Here’s what works best:
- Parmesan – The king of cheese twists. It’s dry, salty, and creates that gorgeous caramelization.
- Gruyère – Melts beautifully while adding a nutty flavor.
- Aged Cheddar – Sharp and tangy with good meltability.
Mix two cheeses for the best results. Parmesan with almost anything else gives you that perfect crisp-melty combo.
Grate your cheese finely! Chunky grates create uneven twists that cook inconsistently.
C. Optional Flavor Enhancers
Want to kick your cheese twists up a notch?
Herbs like rosemary, thyme or sage add amazing aroma. Dried work fine, but fresh herbs really pop.
Spices change everything. Try:
- Smoked paprika for a Spanish vibe
- Everything bagel seasoning for addictive crunch
- Black pepper – seems basic but makes the cheese sing
Don’t forget a light sprinkle of flaky sea salt on top just before baking.
D. Tools and Equipment Checklist
You don’t need fancy gear, but these basics make the process smoother:
- Sharp knife or pizza cutter
- Rolling pin
- Baking sheets
- Parchment paper (not optional – prevents sticking)
- Pastry brush for egg wash
- Box grater or microplane for cheese
- Kitchen twine (helps measure even strips)
- Cooling rack (crucial for maintaining crispiness)
Room temperature matters too. Too hot and your pastry gets sticky; too cold and it cracks when you twist it.
Step-by-Step Preparation Process

A. Thawing Puff Pastry Properly
Getting your puff pastry right starts with proper thawing. Trust me, there’s nothing worse than trying to work with partially frozen pastry that cracks or over-thawed dough that’s sticky and useless.
Take your frozen puff pastry out of the freezer about 30-40 minutes before you need it. Leave it wrapped while it thaws at room temperature. The pastry should feel cold to the touch but pliable – like a chilled stick of butter that gives slightly when pressed.
In a rush? Don’t microwave it! That’s a disaster waiting to happen. Instead, place it on a metal baking sheet which conducts cold away faster.
B. Rolling and Cutting Techniques
Dust your work surface with just a touch of flour – too much and your pastry won’t puff properly. Roll the dough gently into a rectangle about 1/8 inch thick.
For clean cuts, skip the knife and grab a pizza cutter. It gives you those sharp, decisive edges without dragging the dough. Cut the pastry into strips about 3/4 inch wide and 6 inches long for the perfect sized twists.
C. Cheese Application Methods
Here’s where things get interesting. You’ve got options:
- The Sprinkle Method: Simply scatter finely grated hard cheese (Parmesan, aged cheddar) over the pastry before cutting.
- The Press Method: Cut strips first, then press them into a plate of grated cheese.
- The Sandwich Technique: Brush one sheet with egg wash, sprinkle cheese, top with another sheet, press gently, then cut.
Whichever method you choose, don’t skimp on the cheese! It’s what gives those twists their irresistible flavor.
D. Creating the Perfect Twist Shape
Hold each strip at both ends and twist in opposite directions. You want about 4-5 full rotations for a good-looking twist. Too tight and they won’t expand; too loose and they’ll unravel.
Place them on a parchment-lined baking sheet, pressing the ends down slightly to prevent untwisting during baking.
E. Pre-Baking Tips for Extra Crispiness
Want that next-level crunch? Chill your twisted pastries in the fridge for 15-20 minutes before baking. This helps the butter layers rechill, creating more steam and better puff.
Brush with egg wash for golden color, but here’s my secret trick: sprinkle a tiny bit of coarse sea salt right before baking. It enhances the cheese flavor and adds a professional touch.
Bake in a properly preheated oven – 400°F is your sweet spot. A hot oven from the start ensures those layers separate properly for maximum crispiness.
Baking Your Cheese Twists to Perfection

Optimal Oven Temperature Settings
You’d think any old oven temperature would work for cheese twists, but you’d be wrong. The magic happens at 400°F (200°C). Why? At this temperature, the puff pastry gets that perfect rise while the cheese gets all bubbly and caramelized.
Too low, and your twists will be pale and sad. Too high, and you’ll burn the cheese before the pastry cooks through. Been there, done that, threw away the evidence.
Pre-heat your oven completely before those twists go in. I’m talking 15 minutes minimum. An oven thermometer is your best friend here – most ovens are off by 25 degrees or more!
Timing Secrets for Maximum Crispiness
The clock starts ticking the moment those twists hit the oven. For standard-sized twists, 12-15 minutes is your sweet spot.
But here’s what nobody tells you – rotate that baking sheet halfway through. Ovens have hot spots that’ll cook some twists faster than others. Give them a 180° turn at the 6-minute mark.
Want next-level crispiness? After they’re done, turn off the oven, crack the door, and let them hang out for 3-5 more minutes. This drying period works wonders.
Visual Cues for Perfectly Baked Twists
Forget timers—your eyes are the ultimate judge. You’re looking for that golden brown color that screams “eat me now!”
The cheese should be bubbling and have dark golden edges (not black—that’s too far). The pastry should have visible layers with a dry, crisp appearance.
Give one a gentle tap with your finger—it should feel firm, not soft. If it bends easily, it needs more time.
The best sign? When your kitchen smells like a French bakery and you can barely stop yourself from burning your fingers to grab one straight from the oven.
Flavor Variations to Try

A. Herb and Spice Combinations
Ready to take your cheese twists beyond basic? The right herbs and spices can transform them completely. Try these killer combinations:
- Mediterranean Magic: Mix parmesan with dried oregano, basil, and a pinch of red pepper flakes
- French Countryside: Gruyère with fresh thyme leaves and a crack of black pepper
- Garlic Lover’s Dream: Any cheese + roasted garlic powder and parsley
- Everything Bagel: Cheddar with everything bagel seasoning sprinkled on top
Don’t overthink it—just sprinkle your chosen herbs directly into the cheese before you fold the pastry. About a tablespoon per sheet hits the sweet spot.
B. Sweet Cheese Twist Options
Yes, cheese twists can satisfy your sweet tooth too! These combinations might sound weird at first, but trust me:
- Cream cheese + cinnamon sugar + crushed pecans
- Mascarpone + lemon zest + powdered sugar dusting after baking
- Ricotta + honey drizzle + fresh berries served alongside
- Brie + fig jam swirl + crushed pistachios
For sweet versions, you’ll want to brush with egg wash and sprinkle with coarse sugar before baking. They’re perfect with coffee or as a not-too-sweet dessert.
C. International Flavor Inspirations
Cheese twists exist in nearly every cuisine—just with different names and flavor profiles:
- Mexican: Cotija cheese, lime zest, and tajin seasoning
- Indian: Paneer with garam masala and nigella seeds
- Greek: Feta, dill, and lemon zest
- Japanese: Mild cheese with furikake seasoning and nori flakes
The technique stays the same, but these global flavor combos will take your taste buds on a world tour.
D. Dietary Adaptation Ideas
Dietary restrictions? No problem. These twists are super adaptable:
- Gluten-Free: Use store-bought GF puff pastry (Schär and GeeFree make good ones)
- Dairy-Free: Substitute with plant-based cheese like Violife or Miyoko’s
- Keto-Friendly: Replace puff pastry with fathead dough and use low-carb seasonings
- Vegan: Combine dairy-free cheese with nutritional yeast for extra “cheesy” flavor
The texture might differ slightly, but the crispy, savory satisfaction remains. Just watch baking times—alternative ingredients often cook differently.
Serving and Storage Tips

A. Best Dipping Sauces and Pairings
Those crispy cheese twists aren’t just delicious on their own—they’re begging to be dunked! Here are some killer dipping options:
- Marinara sauce: Warm, slightly tangy tomato sauce is a classic for a reason
- Pesto: Fresh basil pesto adds an herby punch that complements the cheese perfectly
- Honey mustard: The sweet-tangy combo works magic with the savory twists
- Ranch dressing: Because honestly, what doesn’t taste good with ranch?
Drink-wise, these twists are practically made for wine night. A crisp Sauvignon Blanc or light Pinot Noir won’t overpower the cheese flavors.
B. Presentation Ideas for Parties
Nobody’s impressed with cheese twists dumped on a paper plate. Step up your game:
- Stand them upright in a tall glass or mason jar—looks fancy, takes zero effort
- Arrange them on a wooden board with your dips in small bowls between clusters
- Color-code your serving platters to match your party theme
- For kids’ parties, stand them in colorful cups as edible centerpieces
The vertical presentation not only looks impressive but keeps those twists from getting soggy on the bottom.
C. Proper Storage for Maintaining Crispiness
The enemy of crispy cheese twists? Moisture and air. Store them right:
- Cool completely before storing (warm twists create condensation = soggy disaster)
- Line an airtight container with paper towels to absorb excess moisture
- Separate layers with parchment paper if stacking
- Keep at room temperature for 2-3 days—the fridge actually makes them go soggy faster
D. Reheating Methods That Preserve Texture
Gone soft? No problem. You can resurrect day-old twists:
- Oven method (best option): 350°F for 3-5 minutes—brings back that fresh-baked crunch
- Toaster oven: Quick 2-minute reheat on medium setting
- Air fryer: 2 minutes at 350°F for crazy crispy results
Skip the microwave entirely—it’ll turn your beautiful twists into sad, chewy disappointments. Trust me on this one.
Conclusion

Mastering the art of crispy cheese twists is simpler than you might think. With just a few ingredients, proper preparation techniques, and careful baking, you can create these delectable treats that will impress family and friends. The versatility of these pastries allows for endless flavor variations, from classic cheddar to adventurous combinations with herbs and spices.
Whether serving them as appetizers at your next gathering or enjoying them as a savory snack, these cheese twists are sure to become a staple in your recipe collection. Remember to store any leftovers properly to maintain their wonderful texture, though we suspect there won’t be many remaining once everyone gets a taste! Try making a batch this weekend and discover your favorite flavor combination.