
Remember that moment when you bit into garlic bread so perfect you actually closed your eyes? And then spent years trying to recreate it?
I’ve been there. After testing 27 variations (and nearly driving my family insane with the constant smell of garlic), I’ve cracked the code to truly perfect garlic bread – that magical combination of crispy edges, buttery middle, and that garlic flavor that hits all the right notes.
This ultimate garlic bread recipe transforms a simple baguette into the kind of side dish that people actually talk about the next day. No fancy equipment required, just a few quality ingredients and the techniques professional chefs don’t tell you about.
But here’s what most recipes get completely wrong about the butter-to-garlic ratio…
The Secret to Truly Crispy Garlic Bread

Why Most Homemade Garlic Bread Falls Flat
Ever made garlic bread that looked perfect in the oven but came out disappointingly soggy? You’re not alone.
The sad truth is most homemade garlic bread fails because of three rookie mistakes. First, too much butter makes bread soggy instead of crispy. Second, using the wrong type of bread that’s either too soft or too dense. And third, baking at the wrong temperature that steams rather than crisps.
Many home cooks also make the mistake of slathering garlic butter on cold bread and expecting magic. That’s like trying to tan in Seattle – not gonna happen.
The Perfect Bread Selection for Maximum Crispiness
The bread makes or breaks your garlic bread game. Full stop.
French baguettes and Italian loaves are your crispy garlic bread superheroes. They have that perfect sturdy crust with an airy interior that crisps up beautifully.
Avoid pre-sliced sandwich bread at all costs – it’s the arch-nemesis of crispiness. And those soft dinner rolls? Save them for another meal.
Day-old bread actually works better than fresh because it has less moisture. Mind-blowing, right?
Oven Temperature Techniques for the Perfect Crunch
Cranking your oven to 400°F-425°F is your golden ticket to crispy town.
Lower temps steam your bread, making it soft and sad. Higher temps risk burning the garlic before the bread gets crispy. It’s a delicate balance, people.
Preheating is non-negotiable. Cold ovens are where crispy dreams go to die.
For next-level results, place your bread on the middle rack where heat circulation is optimal. Bottom rack? Too much bottom heat. Top rack? Too close to the broiler.
Broiling vs. Baking: When to Use Each Method
Here’s the secret the fancy restaurants don’t tell you: the best garlic bread comes from using BOTH methods.
Start with baking at 375°F for about 8 minutes to heat the bread through. Then switch to broiling for 2-3 minutes to get that gorgeous golden-brown finish.
Using only the broiler might give you a bread that’s charred on top but cold inside. Major disappointment.
Only baking? You’ll get warm bread but miss that spectacular crunchy finish that makes everyone fight for the last piece.
Creating the Ultimate Garlic Butter Spread
Essential Ingredients for Rich, Flavorful Butter
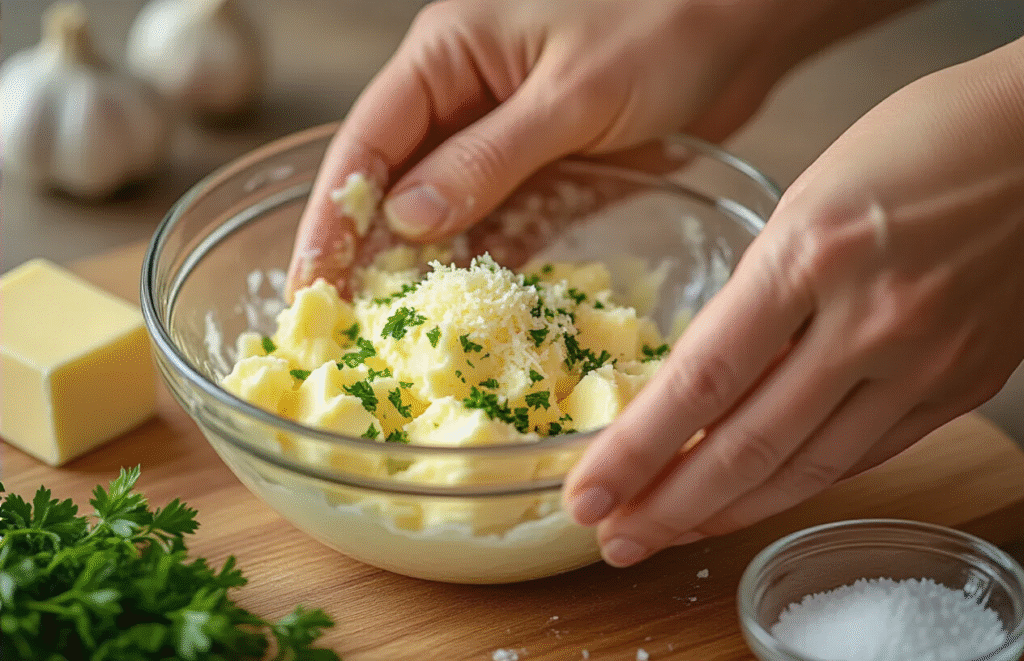
The secret to mind-blowing garlic bread starts with what you mix into that butter. Don’t just grab whatever’s on sale – quality matters here.
Start with unsalted butter at room temperature. Cold butter won’t blend properly, and salted versions make it tough to control the final flavor. European-style butters with higher fat content (like Kerrygold or Plugra) create a richer, more luxurious spread.
For a basic batch that’ll knock your socks off, you’ll need:
- 1 stick (½ cup) high-quality unsalted butter
- 4-6 garlic cloves, finely minced or pressed
- ¼ teaspoon fine sea salt
- 1 tablespoon fresh parsley, chopped
- 1-2 teaspoons fresh lemon juice
The lemon juice isn’t just for show – it cuts through the richness and makes the garlic flavor pop like crazy.
Fresh vs. Roasted Garlic: Flavor Profiles Compared
Can’t decide between fresh or roasted garlic? They create totally different bread experiences.
| Fresh Garlic | Roasted Garlic |
|---|---|
| Sharp, spicy bite | Sweet, caramelized flavor |
| Pungent aroma | Mellow, nutty scent |
| Thinner consistency | Creamy, spreadable texture |
| Bold, immediate impact | Complex, lingering taste |
| Better for crispy bread | Perfect for soft, pillowy loaves |
Fresh garlic packs that immediate punch we all crave, but roasted brings a depth that’s next-level delicious. My favorite trick? Use both. Roast a whole head until golden and soft, then mix with a smaller amount of fresh garlic. You get that initial kick followed by mellow sweetness.
Herbs and Seasonings That Elevate Your Garlic Butter
Basic garlic butter is great, but adding the right herbs transforms it into something spectacular.
Parsley is the classic choice, but don’t stop there. Fresh thyme adds earthy notes that complement garlic’s pungency. A pinch of rosemary brings piney, aromatic qualities – but go easy, it’s powerful stuff.
Want something unexpected? Try these game-changers:
- Smoked paprika for subtle heat and color
- Grated parmesan for salty, umami goodness
- Red pepper flakes for a spicy kick
- Chopped chives for mild onion flavor
- Lemon zest for brightness without acidity
The best combinations depend on what you’re serving with your garlic bread. Making Italian? Add basil and oregano. Serving with soup? Try dill and chives.
Make-Ahead Tips for More Intense Flavor
The biggest mistake people make with garlic butter? Using it immediately after mixing. Giving those flavors time to mingle creates magic.
Make your garlic butter at least 4 hours before you need it – overnight is even better. The butter acts as a sponge, absorbing all those aromatic compounds from the garlic and herbs.
To prepare ahead:
- Mix your compound butter completely
- Roll into a log using parchment paper
- Refrigerate until needed (up to 3 days)
- Return to room temperature before spreading
For even more intensity, try infusing your butter. Gently warm it until just melted, add your garlic and herbs, then let it sit for 30 minutes before cooling and resolidifying.
Compound Butter Variations to Try
Once you’ve mastered basic garlic butter, it’s time to experiment with these show-stopping variations:
Blue Cheese Garlic Butter: Fold in 2 tablespoons of crumbled blue cheese for a tangy, funky twist that pairs beautifully with steak.
Honey Garlic Butter: Add 1 tablespoon of honey for a sweet-savory combo that’ll make breakfast bread absolutely irresistible.
Pesto Garlic Butter: Mix in 2 tablespoons of prepared pesto for an herbal, nutty profile that screams summer.
Bacon Garlic Butter: Stir in 2 tablespoons of crispy bacon bits and a dash of maple syrup for a mind-blowing savory-sweet experience.
Truffle Garlic Butter: A few drops of truffle oil transform ordinary garlic bread into a gourmet sensation – perfect for impressing dinner guests without much extra work.
Assembly Techniques for Even Flavor Distribution

The Double-Spread Method for Maximum Butter Coverage
Ever bitten into garlic bread where some parts are dripping with buttery goodness while others are sadly dry? Yeah, that’s just wrong. The double-spread method fixes this tragedy.
First, mix your garlic butter completely. Now, instead of just slathering it on top, spread a thin layer on each cut surface. Then go back for round two with another layer. This two-pass approach ensures every nook and cranny gets coated.
The trick? Start from the edges and work inward. Most people do the opposite and wonder why the crust ends up dry. Not you though – you’re going to nail this.
Slicing Strategies: How to Cut Your Bread
Cutting your bread isn’t just about getting pieces to stuff in your mouth. It’s about creating the perfect butter-to-bread ratio.
For baguettes, diagonal cuts about 1-inch thick give you maximum surface area for that garlicky spread. If you’re using a loaf, horizontal cuts work better than vertical ones – you’ll get more coverage and less mess.
Don’t cut all the way through! Leave that bottom crust intact so your bread stays connected. This makes it easier to wrap and prevents the butter from dripping away during baking.
Wrapping Techniques That Lock in Flavor
Aluminum foil is your best friend here. Wrap your prepped garlic bread loosely – tight enough to trap steam but loose enough to let the top crisp up.
The boat method works wonders: place bread on foil, fold up the sides without covering the top, then seal the ends. This creates a butter-catching vessel while allowing the top to get that irresistible golden crunch.
For the final 2-3 minutes, open the foil completely for extra browning. This two-stage approach gives you that perfect balance of moistness and crispiness that makes people fight over the last piece.
Baking Your Garlic Bread to Perfection

Timing Secrets for the Ideal Texture Balance
You know what separates good garlic bread from mind-blowing garlic bread? About 2 minutes in the oven.
I’m not kidding. The sweet spot typically lies between 12-15 minutes at 375°F. But here’s the trick – start checking at 10 minutes. Every oven has its own personality, and yours might run hot.
Want that perfect crispy exterior but still soft inside? Cover with foil for the first 8 minutes, then remove it. This two-stage approach gives you the best of both worlds.
For extra crispy bread (my personal favorite), add an additional 2 minutes with the broiler on low. Just don’t walk away – it goes from golden to charcoal in seconds.
Visual Cues That Your Garlic Bread Is Done
Stop relying on timers alone! Your eyes tell you everything:
- Golden brown edges (not pale, not dark brown)
- Butter bubbling slightly on the surface
- The bread has a slight “lift” to it
- When you tap it, it sounds hollow (not soggy)
The perfect garlic bread has a color gradient – deeper gold at the edges fading to a lighter center. That’s your bullseye.
Troubleshooting Common Baking Problems
Made garlic bread that could double as a weapon? Let’s fix that:
- Too hard/burnt: Your oven’s too hot or you baked too long. Next time, lower temperature by 25°F.
- Soggy middle: You used too much butter or didn’t bake long enough. Try thinner butter layer or 2-3 more minutes.
- Burnt garlic taste: Garlic burns easily! Mix it thoroughly into butter and don’t leave it exposed on top.
- Uneven browning: Rotate your pan halfway through baking.
Finishing Touches for Extra Flavor
The magic happens in the final minute:
- Sprinkle freshly grated Parmesan right before removing from oven
- Brush with a tiny bit of honey butter for a sweet-savory combo
- Add red pepper flakes for heat lovers
- Spritz with lemon juice for brightness
- Scatter fresh herbs (parsley, basil) immediately after removing (the residual heat releases their oils perfectly)
Remember to let it rest for 2 minutes before cutting. I know it’s torture, but those 120 seconds let the flavors settle and prevent burnt mouths!
Serving and Pairing Your Homemade Garlic Bread

A. Complementary Main Dishes That Shine With Garlic Bread
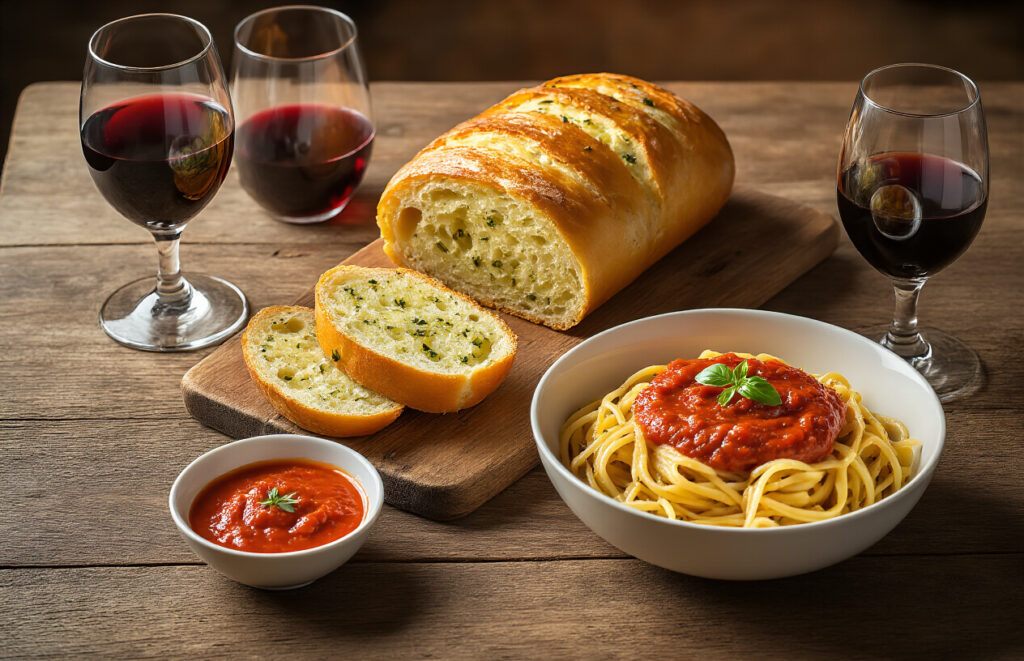
Great garlic bread deserves equally impressive companions. Pasta dishes are no-brainers here – spaghetti Bolognese, fettuccine Alfredo, or a classic lasagna practically beg for a side of buttery garlic goodness. The bread soaks up those rich sauces like nothing else.
But don’t stop at Italian! Hearty soups like minestrone, tomato basil, or French onion are transformed when you have garlic bread for dunking. And what about roast chicken? The combination of juicy chicken and that crispy, herbaceous bread is pure magic on a plate.
Truth bomb: garlic bread even makes simple meals feel special. Pair it with a rotisserie chicken and salad from the store, and suddenly Tuesday dinner feels like a restaurant experience.
B. Wine and Beverage Pairings for a Complete Experience
The right drink can elevate your garlic bread experience to new heights. For wine lovers, a medium-bodied red like Chianti or Sangiovese cuts through the buttery richness perfectly. If you prefer white, go for something with good acidity like Pinot Grigio or Sauvignon Blanc.
Beer fans? Grab an amber ale or a crisp lager. The maltiness complements the toasty bread while refreshing your palate between bites.
Non-alcoholic options work beautifully too. Sparkling water with lemon keeps things light, while a tart lemonade or crisp apple cider provides the perfect flavor contrast to the savory garlic.
C. Creative Dipping Sauces to Serve Alongside
Ready to take your garlic bread game to the next level? Dipping sauces are the answer.
Try whipping up a quick sun-dried tomato and basil dip by blending the tomatoes with cream cheese, a splash of olive oil, and fresh herbs. Marinara sauce is a classic choice that never disappoints.
For something unexpected, serve your garlic bread with a spicy honey drizzle – just mix honey with a pinch of chili flakes and a touch of salt. The sweet-spicy-savory combo will blow your mind.
Feeling fancy? A small bowl of good olive oil with balsamic vinegar and fresh cracked pepper looks impressive and tastes even better.
Conclusion

Mastering the art of garlic bread is easier than you might think. By focusing on achieving that perfect crispy texture, creating a flavorful garlic butter spread, using proper assembly techniques, and baking at the right temperature and time, you can elevate this simple side dish to star status. Remember that the quality of your ingredients—particularly the bread, butter, and garlic—will significantly impact your final result.
Try this recipe at your next gathering and watch as your homemade garlic bread disappears within minutes. Whether paired with pasta, soups, or enjoyed on its own, this crispy, buttery, and intensely flavorful garlic bread will become your go-to recipe. Don’t be afraid to make it your own by adding herbs or cheese to suit your taste preferences. Happy baking!